1.Tire pressure
Check that your tire pressures are suitable for the terrain. Tire sidewalls are marked with the minimum and maximum tire pressures. For example, 1.6 bar (23 psi) is a good starting pressure for tires. Next, adjust your tire pressure to your weight. Tire pressure plays a critical role in how your bike handles. Overinflated tires can cause a harsh ride, and you may also lose traction. Your tire pressure should be set as low as possible without puncturing, damaging rims, burping tubeless, or tires rolling sideways. Huck Norris is a great product that can help you lower tire pressure without damaging tires or rims.
*do not exceed the maximum inflation pressure stated or your tire or rim*
2.Fork tuning
Many suspension forks have a table printed on the lower legs that have recommended settings on setting up the air pressure using psi/kg(lbs) and the rider’s weight. The markings will help set up the forks at a basic level, but even if you aren’t an enthusiast tuner, you should pay attention to your bike and how it rides and adjust as required.
You can get so much more from your bike after understanding why it has a 1000$ fork and not a 400$ fork. Fine-tuning is key to getting the best performance from your equipment.
The SAG
The first step for a good setup with bicycle suspension is the sag. Rock Shox explains sag as; the amount of travel, measured as a percentage of total travel, that the suspension compresses when the rider, including gear, is on the bicycle in the normal riding position. Setting the correct sag allows the suspension to actuate effectively and efficiently. So in practice; Gear up, put your bike near something you can lean against, push the rubber band/o-ring on your fork’s stanchion down to the bottom, and gently climb on your bike. With fork sag, you should stand on your pedals to put a little bit more weight on the front wheel so that you are in a fast riding/attack position, ready to take on some hits. Carefully climb off the bike and check where the rubber band/o-ring has moved to. If the rubber band shows that the sag is between 10% to 20%, the bike will feel fast and grip nicely. However, on the other hand, the ride might feel too harsh for longer rides, and if the sag is too low, you might start to lose trail grip. If your sag is between 20% to 30%, you might lose a bit of the high-speed grip, but the ride will be much smoother. On the other hand, too much sag will cause the fork to bottom out on harder hits. Unfortunately, there is always a compromise, and there is no exception in the case of a full-suspension bike. Your fork setup is linked to your rear suspension if you have a full-suspension bike. The basic rule here is to adjust the suspension so that when you are bouncing on your bike, both the shock and fork should feel like they are traveling as much as possible. If it feels like your fork dives, you should add more air and vice versa.
Ok, that is the first step toward your fork tuning. However, there are a few more steps to take. For example, Rock Shox has several tuning options in their forks: rebound, low-speed compression, high-speed compression, threshold, and lockout. And if you have some other manufacturers fork, they may have some other names to add to the list.
rebound
All good forks should have rebound adjustment. Rebound adjustment affects the speed of the fork extending after it compresses during a hit (e.g. how fast the fork bounces back from an impact). If you have adjusted the rebound so that the fork bounces back too rapidly, the bike might be hard to handle on rough trail sections, and you might lose control. On the other hand, if the rebound is adjusted too slow, the fork might not extend fast enough for the next hit or compression. There is no right or wrong setup here. Generally, a completely open or closed rebound is not a good setup. Otherwise, it mainly depends on how you ride and what makes you feel comfortable. The markings are slightly different for rebound adjustment, depending on the fork manufacturer. RockShox has a turtle and a rabbit, and it is straightforward to understand. The rabbit makes the fork bounce back faster and the turtle slower. However, Fox suspension uses + and – markings which are a little more confusing. The + symbol here doesn’t make the fork faster. Instead, it adds more resistance, so your fork has a slower rebound..
low-speed compression (lsc)
The next step towards a better performing fork is low-speed compression (LSC) adjustment. LSC works, as the name suggests, at low speed when the shock is compressing slowly (you can still ride fast though!). First impressions of LSC adjustment you can feel when pedaling the bike. If it feels like your fork doesn’t carry the weight of the movement when you pedal, your LSC is adjusted too soft.
high-speed compression (hsc)
Most advanced forks have a high-speed compression (HSC) adjustment. HSC starts to work when the pressure rises too high for the LSC valve. This happens on square edged hits, when the shock or forks shaft speed increases rapidly.
Compression setup
As a rule of thumb, the less compression damping you can get away with, the more comfortable your bicycle feels. Unlike motorcycles, bikes have less sprung mass. Therefore you’ll do the most work on compressing the shocks on an impact. More work for you means a harsher ride. Also, with less compression damping, the higher frequency impacts negatively affect your body while riding.
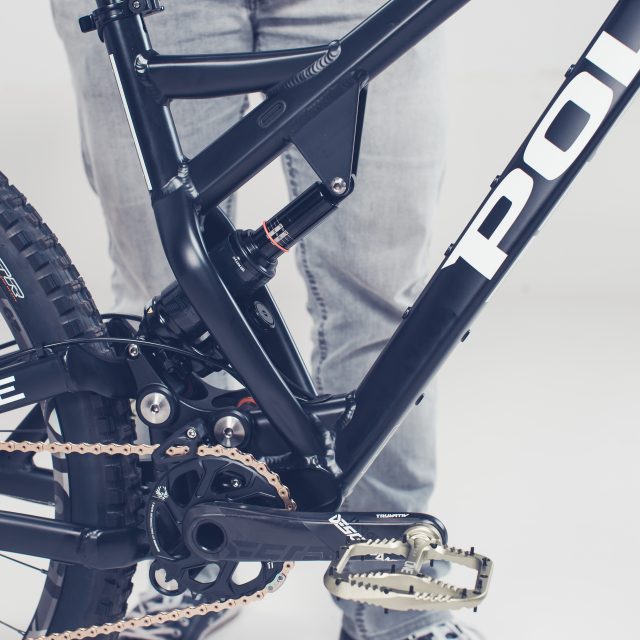
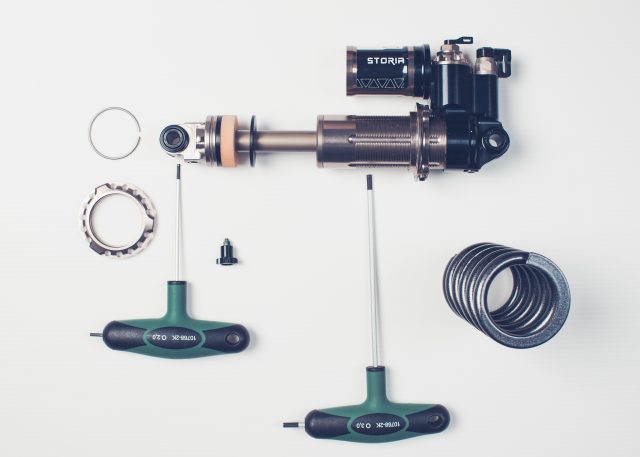
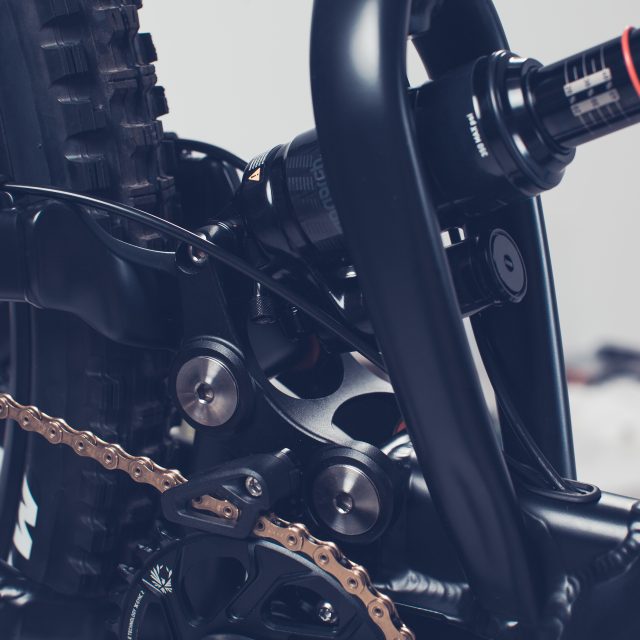
3.Rear shock tuning
We have designed Pole bikes so that the recommended sag for the shock is 30%. As described previously in the Fork section, sag is how much your fork/shock sinks into its travel by having your body weight on it. All rear shocks have a rubber o-ring around their stanchion tube which is used as a travel indicator. Coil shocks have a larger bumper rubber, which helps if your shock bottoms out.
Some examples: RockShox uses a red rubber o-ring. RockShox also has the measurements in the shock stanchion. EXT has a wider yellow bumper rubber which is also used as a travel indicator. With EXT, you need to estimate the 30% sag or measure it with tape. Cane Creek uses a similar system to RockShox with a black rubber o-ring. Again, you need to estimate the 30% sag or measure it with a tape measure like the EXT shock.
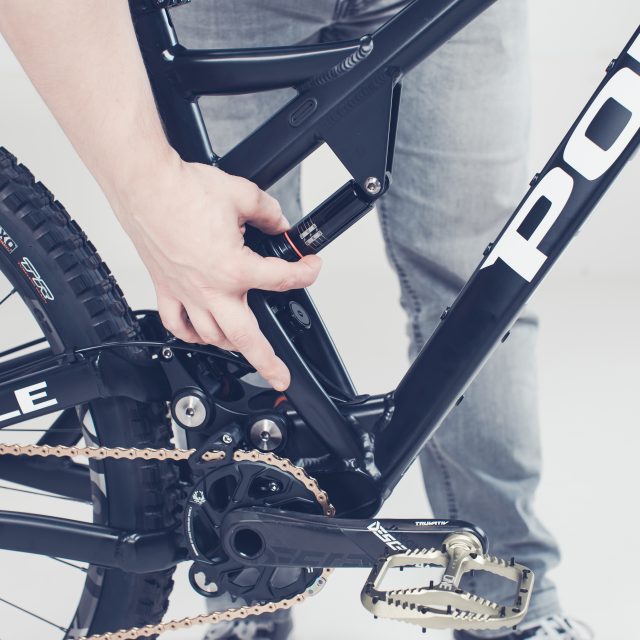
In most of the cases, there are many other adjustments in your shock than just the travel indicator. Usually, there is at least rebound damping adjustment. At this point, we suggest that you either open all the adjustments or keep those in the middle. The only exception is if your shock has a three-stage switch where you can select the lock-climb-open mode you must put this in open. Otherwise, the sag measuring won’t work properly.
The basics of setting up the sag are the same with all shocks; Slide the travel indicator against the damper. There are many other adjustments to your shock other than the travel indicator in most cases. Usually, there is at least a rebound damping adjustment. At this point, we suggest that you either open all the adjustments or leave them set in the middle. The only exception is if your shock has a three-stage switch to select the lock-climb-open mode. To set the sag you must put the shock in open mode.
- Sit on your saddle and carefully lift your feet for a second to put your whole weight on the bike. Try not to bounce when doing this
- If the travel indicator shows that the sag is over 30%, you will need to add more pressure to your shock. In the case of a coil, you should replace it with a stiffer rating spring.

4.Ride height
5.Saddle setting
Your saddle position depends on your riding style.
Position on the rails. If you ride uphills mostly, your saddle should be adjusted as far forward on the rails as possible. If you ride on flat sections, you want your saddle moved slightly further back to get better balance for pedaling. If you want a more upright posture for ergonomic reasons, push the saddle forwards.
Saddle angle. If you ride only lift-assisted trails, the saddle nose angle should be pointing upwards more. The reason for this is that your bike points downhill for the vast majority of the ride, and you want to be able to sit on a level saddle. If you ride flat trails, your saddle should be parallel to the ground. If you ride up and down mountains mostly, your saddle nose angle should be pointing downwards slightly. When climbing, this helps save energy by keeping your position on the saddle level.
If you ride very steep sections, it helps if you lower the seat 20-30mm from your ideal pedalling position height.
6.Handlebar
When your seat is positioned correctly, handlebar height determines how much your body weight is distributed to the front wheel. If you feel that your front end is too light and the steering feels twitchy when ascending, remove one 5mm spacer at a time from under the stem on the steerer tube to the top of the stem. For some riders, it helps to move the handlebar higher to get more grip to the front wheel. If your riding style is more rear balanced, lifting the bars can give you more pressure on your front wheel due to better weight distribution. This is a good indicator for the right handlebar height for descending. The more upright you can stand without losing traction on the front wheel, the better. Make sure that your handlebar’s backsweep is also pointing in the right direction. The most common mistake is to turn the handlebars so that the backsweep becomes upsweep. Instead, the handlebars should be set horizontally towards your body.
7.Brake lever and trigger positioning
Check your brake lever position. You should be able to reach the levers with your index fingers. The brake levers can be moved along and rotated around the handlebars, and the lever’s ‘reach’ can be adjusted with a tool or by hand. The brake lever position depends on riding style and hand size. The brake levers should be adjusted level to the ground more than pointing downwards. Adjusting your levers right helps your arms relax and shifts your weight from the front of the bike when braking on descents.


